Showing posts with label Art School. Show all posts

Friday, March 18, 2016

How to Oil Paint, Choosing colors for oil painting -- Part 4 of 4,

Van Eyck's The Marriage of Giovanni Arnolfini (1434)

How to Oil Paint, Choosing Colors for Oil Painting, Properties of Oil Paints...Drying Rate

Oil Paints unlike most other paints, change little as they dry in colour, but they do change slightly, becoming slightly darker and a little less brilliant. This is not really a noticeable change however.
So it is not really a concern to us as oil painters so much.

The rate at which the individual paints dry is important when you are building up a painting in layers. It is important to not paint fast drying paint layers over slow drying painting layers, until the slower drying layer is completely dry, in order to prevent the risk of problems occurring on the surface such as wrinkling or cracking of the paint in the future.

The very slow drying colours are titanium or zinc whites, ivory black, cadmium colours, vermillion and rose madder. Less slow drying but slow are ultramarine blue, cerulean blue and yellow ochre.

Colours with an average rate of drying are raw sienna, naples yellow, cobalt blue, chromium oxide (green), viridian, and earth red colours.

Fast drying colours are Prussian blue, raw umber, burnt umber, phthalocyanine blue, phthalocyanine green, flake white, burnt sienna and davy's gray.

So it can be seen that if you have a slow drying colour and you want to speed up it's drying rate, and you are also wanting to use a lighter shade, you can mix flake white instead of titanium white into the colour to quicken the drying rate. Alkyd mediums such as Liquin also help to speed up the drying process, although their primary purpose has been usually to make it easier for paint colours to flow under the brush.
 
If you like to see earlier parts of this article see Part 1, Part 2 and Part 3 for further properties of paint and choosing a palette for starting oil painting.

Tuesday, March 15, 2016

How to Oil Paint, Choosing colors for oil painting -- Part 3 of 4

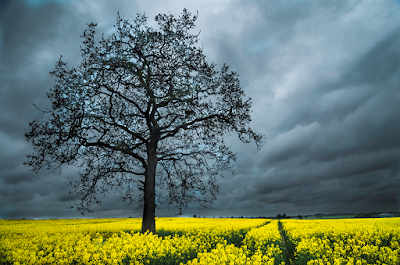
Photo I took last year on the way to work in Carlow, Ireland. A storm was on the way and I was driving when I saw this tree and had to stop.
 
Properties of Oil Paints -- Part 3
 
Depending on your style of painting, another property to consider is the transparency or opaqueness of each paint. Transparency is the degree to which a colour allows light to past through it from above, and allow this light to reflect back to your eye from the colour underneath. If you paint a transparent yellow over a blue paint, the eye will see a greenish colour. This is because the blue is covered by the yellow but is allowed to reflect light back through the transparent yellow to your eye. 
 
Paints like ultramarine blue or burnt sienna are transparent and make good paints for glazing. If you like to build up the paint in layers choose transparent colours. Adding white to a colour will reduce it's transparency.
 
Here is a list of transparent colours:
Viridian, Ultramarine Blue, Prussian Blue, Phthalocyanine Blue, Phthalocyanine Green, Green Gold, Ultramarine Violet, Cobalt Violet, Rose Madder (not so light fast), Manganese Violet, Indian Yellow (not so light fast), Transparent Oxide Yellow, Transparent Oxide Brown, Ivory Black, Quinacridone Gold, Transparent Oxide Red.
Here is a list of semi-transparent colours:
Cobalt Blue, Transparent Gold Ochre, Aureolin (not so light fast), Burnt Sienna, Burnt Umber (some brands), Raw Sienna, Davy's Grey.
 
If your style of painting is to fill in large dense blocks of colour, you should consider working with more opaque (non-transparent) colours that cover areas well. Opacity is also called covering power, the power to block out an underlying colour.
 
Here is a list of semi-opaque colours:
Yellow Ochre, Raw Umber, Greenish Umber, Vermilion, Burnt Umber (some brands), Deep Ochre, Gold Ochre, Burnt Green Earth.
Here is a list of opaque colours:
Flake White, Titanium white, Naples Yellow, Mars Yellow, Mars Orange, Cadmium Orange, Cadmium Yellow, Cadmium Red, Mars Red, Mars Violet, Mars Brown, Venetian Red,
Indian Red, Light Red, Brown Ochre, Terra Rosa, Red Ochre, Chromium Oxide Green, Cerulean Blue, Mars Black.
 
I hope this helps those beginning to paint out there, stop back another time to see more information on choosing paints, in part 4 in next few days. Also check out part 1 , part 2 and part 4 of this article.

How to Oil Paint, Choosing colors for oil painting -- Part 2 of 4

 
Art Instruction, Choosing Colors for Oil Painting -- Part 2 Paint Properties 

Many art colleges and universities have over the last years especially, focused their attention when instructing art students, on encouraging the students to work primarily on their creativity and to "express themselves". However this has meant that the actual materials they should use to express this creativity have often been overlooked.

As you progress your journey in becoming an oil painter, you may like / should try to learn a little about the various different properties that individual paint colours possess. Apart from the obvious properties to consider such as hue, value and colour, there are properties such as transparency, opaqueness, oil content, type of oil, pigment content and light-fastness of the paint colour. Also how fast they dry, their tinting strength and their consistency. Then there are factors of compatibility with other pigments. Lastly, and important too, some paints contain lead and care needs to be taken in working with such paints. Different manufacturers will mean the same colour could be slightly different from brand to brand also.

The most important property of a paint colour is it's light-fastness.

Colours fade when their molecules are broken down when exposed to the power of light, the shorter the wavelength the more the power the light will have. So UV light packs a punch. Some pigments are better at withstanding this attack. Iron Oxide colours and heavy metal colours, such as cadmium or cobalt can withstand UV light.

If you want to protect your artwork from fading, then it is best to choose colours with good light fastness properties and avoid displaying the painting in direct sunlight. This means - how likely is the paint to fade in colour over time. Quite a bad feeling if you see your beautiful portrait of a loved one fading into obscurity after a few seasons on the wall....So what should you do?
Look to buy paints with an ASTM (American Society for Testing Materials) rating of I (very light fast) or II (lightfast enough to use for painting).
If you use ratings III, IV or V then the colours will change in time and may fade completely. Alizarin Crimson is one of the paints that is best avoided as it is not light fast. A good alternative is Permanent Rose, also called Quinacridone Rose or Rose Lake. It is PV19.
Different brands have different notation. Winsor & Newton use A (permanent), AA (extremely permanent), and also the above I,II,III system too sometimes. Daler & Rowney Georgian brand use Permanence followed by *** symbols. Three stars is fine and four is best.

The next quality perhaps to consider is the quality, or pigment content of the paints.

Depending on the brand, most paints come in two grades, artists and students. Artists grade paints are made with the higher amount of pigment content and less extenders, and they produce stronger more vibrant levels of colour. They also cost a lot more in some cases! If you are starting out, it might be worth while to buy the student grades for now. The difference is not so noticeable, I have found, although the fact that paints can last a lifetime depending on your rate of working, and use of a colour, perhaps the better investment is to go for the more expensive brand when you can afford it. I use the best I can afford when I am doing commission work or work for sale.

For more tips about properties see part 1 , part 3 and part 4 of this article.

Saturday, March 12, 2016

How to Oil Paint, Choosing colors for oil painting -- Part 1 of 4

Choosing what colours to include in your oil paint palette is individual to every artist, and depends on their style and their subject matter, but this post is just a brief look at some of the choices that are out there.
If you are good at mixing colours and want to travel light, then you can actually get away with around four or five colours. Yes hard to believe, but that is all you need if you have the skills to mix the colours correctly. Of course adding five or ten more adds to the expense of getting started but can make painting much easier, avoiding the task of trying to get that shade you want but can't quite figure it out.
The above photo shows four colours -- a very basic set, titanium white, French ultramarine, cadmium yellow and cadmium red. From these four, travelling light, you can mix all the shades necessary for to paint any skin tone, and paint portraits.
The photo next, shows pretty much all the colours most people will ever need, if they are reasonably good at mixing colours. They are as follows: Titanium white, Yellow Ochre Pale Hue, Yellow Ochre, Cadmium Yellow, Raw Sienna, Cadmium Orange, Cadmium Red, Permanent Rose, Permanent Magenta, Permanent Mauve, French Ultramarine, Cobalt Blue, Cerulean Blue, Viridian, Venetian Red, Raw Umber and Burnt Sienna.
And a few additional colours that sometimes I use to save time.... Cadmium Yellow Pale Hue (which is a lemon yellow), Naples yellow (a nice yellow for dusty desert scenes), Manganese Blue, Prussian Blue, Indigo, Oxide of Chromium ( a useful natural green), Indian Red (useful for skin tone when combined with white), Burnt Umber, and Paynes Grey.
Although some people like to include black, I have not included it here as I rarely need such a dark colour, and many nicer dark almost blacks can be mixed using other colours.
Anyway these are my suggested colour range if you are starting out, and can't decide what colours to buy. You can buy a few ( four), seventeen or all twenty-six if you feel like splashing out, but maybe best to start with just a few until you see how much you like painting....
 
See part 2 , part 3 and part 4 of this article for more information on choosing paints.

Tuesday, May 31, 2011

Landscape Paintings, People in Landscape Oil Painting Update

Following on from earlier in the month, this is a further stage in what is a large painting by my standards. I still have a lot of work to do on refining tones and background. This is 30" x 20" oils on canvas. In this painting I have to get the tones just right for to allow the bright areas to really glow, as making the feeling of light on a flat surface with paint is limited compared to how bright things look on say a television or with actual light sources. Hence achieving this in a painting really makes them come alive. Hopefully I can get it as good as possible here. I also hope to finish this soon, maybe in the next week or so. Jim

Thursday, August 28, 2008

How to Oil Paint -- Art Instruction -- Color Theory in Perspective - Aerial Perspective

Todays post is very useful for learning about why we see things as they are... but first I'd like to introduce you to my etsy shop where you can buy beautiful prints of my favourite paintings. Feel free to browse and even buy for a friend or yourself, they make great presents at affordable prices, if you are stuck for what to get someone.

Also see my Art Designs on clothes for sale. Visit http://shopvida.com/collections/voices/jim-shanahan to purchase beautiful designs of my art on clothing. Beautiful flower designs and others on scarfs and tops. Enjoy and have a chance to buy a unique item - not available anywhere else or in shops, created by me!!

Aerial Perspective

Creating the illusion of three dimensional distance on a two-dimensional surface is not an easy task. It helps to follow simple rules relating to what is known as aerial perspective. Aerial perspective doesn't mean aerial viewpoint! Here's a little background theory.


At midday we notice the most intense blue sky. White sunlight is travelling through the air and certain wavelengths are being scattered by the atmosphere. Small oxygen and nitrogen molecules scatter the shorter wavelength rays, the violet and blue portions of the sun's light. These bluish light rays bounce around everywhere and create the blue sky we see. But why is the sky not violet then? Actually our eyes are more sensitive to blue and the sun emits more blue light than violet so blue predominates in the light that is scattered. At sunset the rays have to travel through more atmosphere to reach our eye, so all blue is lost (refracted / scattered) and what remains is the red / orange rays. Hence red sunset! Simple enough.


So what does that tell us..
Well during daylight, that there is a lot of blue light particles scattering around in the atmosphere around us. So if we look at something they are in our line of sight. Each contributes a little blue to what we see. The further away an object is from us, the more of these blue light particles are in our way making the object take on a bluer appearance. Hence the faraway mountains appear blue. Yellow is the first naturally occurring colour to disappear due to this blue effect, as yellow and blue make green - so yellows become greener and fade. Red is not commonly found in nature, but it changes to purples or browns, losing intensity with distance.

Now to complicate things a little more. This explains the major effect of aerial perspective. But there are some minor effects. With distance less light of any colour reaches us, so colour becomes less intense, even as it tends to blue. So colour in general fades. The more light an object emits the more this is evident, and the object blends more with the surroundings. White objects emit the most light, all the wavelengths, so the contrast between them and surroundings is reduced the most. Black objects absorb light so are actually absorbing some of the blue and hence a slight increase in contrast is created between them and surroundings! Nevertheless this effect is minimal compared to the first blue haze effect. But it does mean contrast between light and dark is greatest up close, so worth bearing in mind.


What happens at night? Well if the object is black not much! You can't see it. But if an object is luminous or emitting light of any description, most lightly due to reflecting light from a light source, then that light is not passing through an atmosphere full of blue light particles as there is no sun. A full moon might act a little like the sun but generally speaking it has little influence. What does happen is that as before light reaching you from the object is scattering - the atmosphere is still there! So the light with longest wavelengths reaches you most easily. These are reds, browns and yellows. Mostly shades that tend toward dull reds and browns reach you.

Well thats about it for the understanding. Have a look at the photos for the reality of what it means to colour choice in landscapes. Also don't forget, feel free to check out my etsy shop for beautiful prints of my paintings.

Also see my Art Designs on clothes for sale. Visit http://shopvida.com/collections/voices/jim-shanahan to purchase beautiful designs of my art on clothing. Beautiful flower designs and others on scarfs and tops. Enjoy and have a chance to buy a unique item - not available anywhere else or in shops, created by me!!

Here are some other articles that might be of interest.
Landscape Oil Painting Demonstration
Landscape Painting showing Aerial Perspective
Seascape showing some Aerial Perspective
Seascape 2 showing Aerial Perspective


Sunday, July 13, 2008

How to Oil Paint-- Art Classes -- Snow scene - Landscape Paintings Oil Demonstration


Welcome back or just welcome if you are new to my blog. I'd like to introduce you to my etsy shop where you can buy beautiful prints of my work for yourself or they are ideal as presents for your friends if you can't think what to get them, especially as I price them at a very reasonable 10 - 14 dollars. Now on to the lesson... enjoy!

Learning to paint
One of the aims of this blog is to provide some insight into painting. So as promised in previous posts, I intend to show step-by-step demonstrations of work in progress. Above is a photo which was shown in an earlier post, obtained off http://www.wetcanvas.com/ free photo directory. I started a painting of this scene on a primed mounted canvas 12"x 16".


Getting started - The initial composition
Using a number 2 hog-hair filbert brush, I created the inital sketch of the scene. I drew out the fence posts in raw sienna, and all the other elements in cobalt blue. For medium, I used a small amount of "Sansodor", (this is a slow-evaporating white spirit). As much as possible, I try to get every element in the correct position at this stage. It saves a lot of time later, if you can always strive to "get it right first time", or get as close to right as possible. As I draw, I check each fence post position and other lines I create, to see their postion in the overall scene is correct. I also stand back and look at the size of the "negative spaces" that are being formed and their shape. I am careful to avoid straight lines in any part of the drawing, except the fence posts. Straight lines rarely occur in nature, and create an unnatural look. Although I used raw sienna here, if I was drawing it again, I would use cobalt blue on the shape of the tree, as this was protruding into the sky and created a problem with overpainting later. I drew some not so definite lines to show where the cloud shapes would be.

Underpainting - Choosing the colours.
When I looked at the photo I could see that the snow blue is much darker than the sky blue. On the colour wheel we have ultramarine, cobalt blue, pthalo blue, cerulean blue and manganese blue to choose from. I don't list prussian blue as it is a somewhat neutralised version of pthalo blue and lies inside the colour wheel circle. Ultramarine is too dark I felt, and lies next to purple shades, so I decided to try using lighter blues, cobalt or pthalo. I didn't have pthalo blue but I had cobalt and manganese. I decided to try creating a shade midway between these for the snow foreground, so mixed these in 50:50 proportion. Looking at my photo below, there is some different shades created in the blue of the snow foreground. Darker parts contain more cobalt, and lighter parts a slight addition of titanium white to the 50:50 mix. I don't like to use flake white as it contains lead. So using these combinations and a no.1 flat hog hair brush, I painted the foreground in a reasonable amount of detail, but not extreme detail. I tried to create smooth brushstrokes and avoid ridging of the paint. Later when dry I can overpaint a glaze to reduce some of the intensity of these colours. At this stage I want to continue covering in all areas of the white canvas as soon as possible, but also trying to get the balance of colours close to what is needed. Removing the white of the gessoed canvas allows an easier interpretation of the way forward, as the plain white can throw you off easily. So I also paint the white snow areas beyond the foreground shadow on up to the horizon. In doing this, I include some slight blue shading on the snow surface, using the same shades as before.


Underpainting continued - Painting a sky in oilsPainting the sky, I need a very light colour blue for the areas of the sky close to the horizon. I also need to increase the intensity of this shade in the higher parts of the sky. I'm not talking about cloud here, just the sky. For this I use my manganese blue with titianium white to lighten it. This is initial underpainting, but I try to smooth out the brush strokes. All painting to this stage has used the same no.1 flat hoghair brush. One thing I try to avoid is dabbing. By this I mean, you've put the paint on the canvas, then you spend ages trying to spread it further. It's so much easier and quicker just to get more paint. I tend to do two to three brushstrokes maximum before reloading the brush. I won't go into how to load the brush correctly here, but will write an article on that at a later stage. Now, on to the clouds. Here I am using a mixture of ultramarine with some titanium white, interspersed with varying amounts of cobalt blue. It's very much an instinctive approach to creating the various lights, darks and shapes needed. As I paint the cloud I am also drawing it's shape out, and leaving the occasional space for the lighter sky to show through.

I have to leave everyone hanging on a limb now, but check back tomorrow and see the continuation of this online oil painting demonstration...which will continue to the stage shown below. Still not finished! I hope you are enjoying it and feel free to comment. Check here for my ebay auction also.

Thursday, July 10, 2008

Art School, Art Instruction -- How to make a simple frame...

View my latest ebay auction.

Art School -- Art Instruction -- Picture Framing made simple!
Some weeks ago I decided to start painting some small pictures in the style known as paint a day. Paint a day paintings are really small paintings, around 8" x 10" maximum size and are produced exactly as the name suggests with a picture everyday. To compliment these small pictures I decided to try making a frame for each one, but I didn't want to go to any large expense. Here I explain briefly how to make a light and inexpensive frame.
.
I bought two different shape lengths of timber, and glued them together as seen in the photo above. The timbers are those lightweight pine strips found in most large hardware stores. In cross section, one is square and the other was flatter and rectangular. I used six clamps to hold the strips together as the glue dried. I clamped along every foot or so of the strips. I left these to dry and set hard (a few hours at most), then I used a mitre box to cut the glued timber into four sides of the frame. The saw I used was just a handsaw but one which cut precisely and neatly. I measured the sides to correspond to the picture size, but allowing the smallest gap around the picture. This is a matter of personal choice, you can make it closer if you like. With the four sides cut out, I sanded all rough edges and glued them together. Now the tricky bit was to get the frame held in place. You definitely need a rachet clamp for this, nothing else really works, as you have to keep pressure equally on the frame from all sides simultaneously. Once that was done, I left it overnight, painted it and voila! One ready to use frame.

You can put the eyehooks for the cord in the inner sides of the back piece, instead of the back of this piece. This will allow the frame to hang flat against a wall, and not jostle about.

Here is a look at the final product, and looks quite okay for cost and time involved. Once you get used to making these simple frames, you could progress on to making more professional looking frames, as the principle is the same. You just need to invest a little more in the materials. Click Paint a Day to see the above painting up close.